In the first of three blog posts about TDD, I discussed why TDD is important.
In this post, I’ll highlight five behaviours that will make your TDD much more effective.
1. Write the test first Obvious? Yes. Easy? No. But it’s really important to make sure your test can fail (is red) — if it can’t fail, then there’s no point in writing it, because it’s vacuous (won’t tell you anything). Don’t you dare write a single line of code before having a failing test!
2. Solve one error at a time It’s tempting to jump ahead when you know what the next two steps should be. But get in the habit of being rigorously methodical about your test-solving. If you have a no-method error, define the method but don’t let it do anything. Let the error messages guide you.
Again — obvious but difficult to do.
3. Run your tests before committing to GitHub You never know what fun thing has broken and it’s awfully embarrassing to push code up with failing tests.
4. Run your tests after pulling from GitHub In case your colleague or you in a previous life has forgotten step 3.
5. Don’t refactor until you have a green test. This is a hard discipline, but it will save you hours. Trust me. I spent a couple hours in a red/refactor/red/red/red/red/red/red/red/red/red. Total waste of time. Never again.
Read my other blog posts in this series: Why TDD Committing to TDD
Ok, so what’s a favicon? Possibly my new favourite little bit of code, favicons are the images that display in browser tabs.
You probably recognise most of those icons, right? They’re a quick and easy visual way for a user to orient herself while using the browser.
So I present to you my guide to adding a favicon to a Rails app.
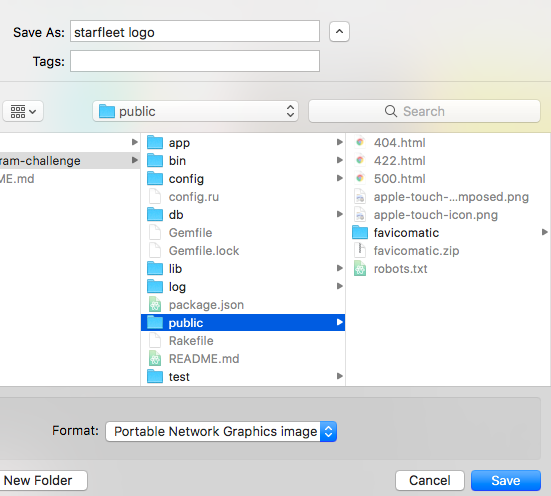
Step 1: Find the image or logo you want to use as a favicon. Save it to your rails project’s public folder.
Step 2: Go to your favourite favicon generator online — I quite like Favicomatic. Upload your image and save it as favicomatic.zip (or whatever yours is called) to your public folder. (I already had a favicomatic.zip folder, which is why mine has the (2)).
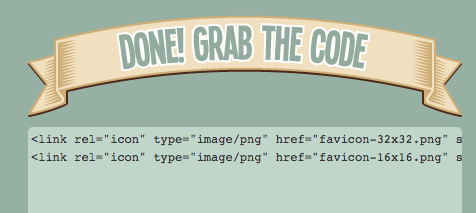
Step 3: Grab the HTML code from the website (there are two sizes to choose from) and paste it to your application.html.erb file, just under the title.
Step 4: Open the favicon folder (here renamed from favicomatic(2) to favicon.zip) in the finder so you can unzip it. It’ll appear as an unzipped folder in your project. Delete the zipped version. Note that the folder MUST be called favicon for Rails to find it.
Step 5: Refresh your browser and admire your favicon!
PS Hawk-eyed readers will notice that I named this ‘starfleet logo’ in Step 1. Apparently I am unable to tell Star Trek and NASA apart.
This week was Rails week, and our remote cohort of 17 programmers from 5 countries working in 3 timezones spent a week making Acebook, a clone of — you guessed it — Facebook.
It was a great, if hard, week. My learning shot up exponentially. Also my ice cream consumption. Here is what I learned:
1. Red/refactor/red/red/red/red/red/red/red/red/red/red/red/red/red/red/red/red/red/red/red/red/red/red is not a great cycle. Red, green, and ONLY THEN refactor. We spent a lot of time looking for bugs in our code when it turned out our partial was named incorrectly and Rails couldn’t find it.
2. Polymorphic (alas, not paulamorphic, much as I love eponymous taxonomy) associations are really cool. I’m glad they’re so cool, because here was the process in which my pair and I learned about them:
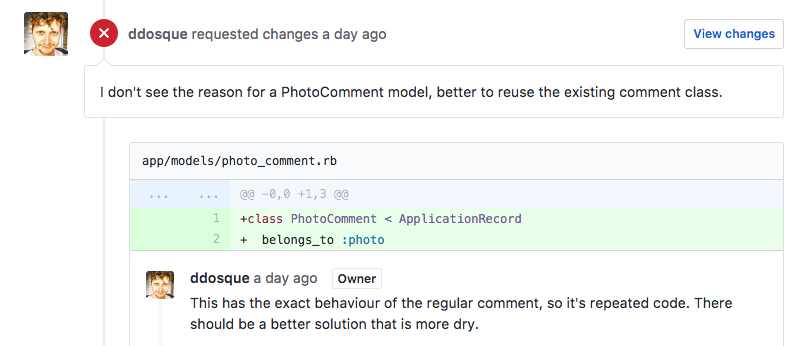
Step 1: Build a PhotoComments functionality, almost wholly copying the already-existing Comments functionality. This was not remotely DRY, but we couldn’t figure out how to get round the database issues. This took a whole day because of the aforementioned red/refactor/red/red/red/red/red/red/red/red/red/red/red/red/red/red/red/red/red/red/red/red/red/red and we were super pumped to finally have it submitted for PR.
Step 2: Our coach tells us that there has to be a dryer way and blocks our PR. His name is Dan, and he’s a great coach because he made us go and find something way better. Was I still banging my head in frustration? Yes.
Step 2.5: Help my landlord remove the old dishwasher that’s being replaced and end up with a broken hose and water gushing out over the kitchen floor before I luckily had the presence of mind to switch off the water switch on the pipe. Not flooding the kitchen is possibly my proudest moment of the whole week, and I’m pretty proud of Rails. I did later get a bottle of prosecco as a reward for valiant behaviour, so all in all, a good week.
Step 2.75 Have standup without coffee or breakfast (see Step 2.5) and decide to throw out everything we did yesterday.
Step 2.90 Go to make coffee, forgetfully turn on the kitchen tap, and watch the water flow out everywhere. Put a tea cosy over the faucet so that doesn’t happen again.
Step 3 Google. It’s a solved problem, so look for the most obvious answer:
This first searched proved extremely productive (newer searches first):
Step 4 Use TDD to build a polymorphic database!
Step 5 Be foiled in your attempts to merge your PR because of merge conflicts that can’t be resolved in the ten minutes before retro.
Step 6 Spend another hour that night working on all kinds of git conflicts.
Step 7 Give up on resolving the merge and write a blog.
Still, polymorphism is really cool. And if you’re still awake, you might be wondering what it is! Basically, it’s a way of reusing code so that, for example, the code for comments could be used for both posts and photos. It defines the DB associations so that the comments are polymorphic, i.e. can exist with either a post_id or a photo_it. The Ruby on Rails Guide has a great section which we found really useful, and there are various other blogs with step-by-step instructions.
So I think that’s it for Rails week. I’m building an Instagram clone this weekend, so I’d better get off the computer. I can’t stand Instagram, so if you’re very lucky, you might get a grumpy post from me about how I wish I could use Rails to build something more interesting this weekend. Or about how I tried to build something more interesting and ended up melting my laptop.
This bug was annoying and caused the coders a great deal of heartache and misery.
The coders were tempted to give up on solving the bug.
But they persevered, and the bug was fixed.
This is also the story of Makers Academy, encapsulated in this one small story about a bug.
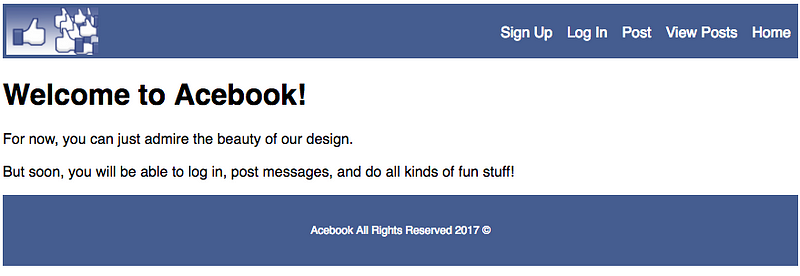
On Monday 29 May 2017, my pair partner and I submitted a pull request for the front end we had built and styled using Ruby on Rails 5. We were quite proud of our design, and rightly so. It was a clean, elegant user interface, modelled shamelessly on Facebook (our whole-team project was to build “Acebook”).
Our coach asked for some changes, one of which being to fix a test that had mysteriously begun to fail (first lesson learned: run your tests again before submitting a PR), the second to restyle a button class according to Rails syntax.
The first failing test was relatively easy to fix: a stylesheet had been required twice. Turns out you don’t need to explicitly require your stylesheet as it will be automatically required as long as it’s located correctly.
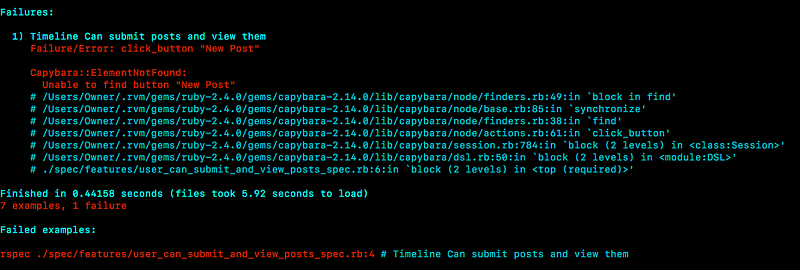
Which led to the second error: ‘unable to find button “New Post”’.
This error would drive us round the bend.
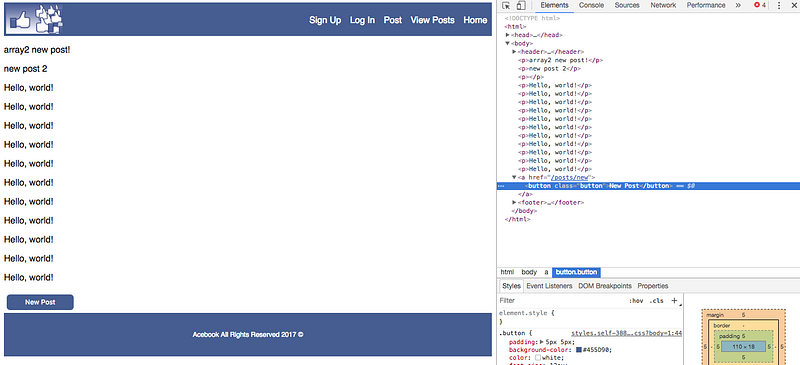
We could see quite clearly on the page that there was a button; we could inspect it with the chrome devtools and see its lovely button classiness.
And yet Capybara couldn’t find it.
I Zoomed one of my teammates, and when he couldn’t find the error either, I retired in defeat for the night. When we resumed the next morning, I showed the error to my full team of four and no one could figure it out.
So we called in the big guns: our coach.
We then spent a good half an hour exploring differences between Rails 4 and 5 syntaxes (‘form_to’ vs. ‘form_with’ anyone?), changed a lot of things around, and eventually reset the test and code to a point at which it was working. We couldn’t figure it out.
Eventually our coach said, “Sometimes you just have to say ‘that happened’.” That sure did happen. But there was one thing I couldn’t understand: why the test passed when it said ‘click_link” when the code was clearly a button, yet failed when the code said ‘click_button’.
Then our coach got the light in his eyes that said, “I now know the answer, and I am going to leave it to you guys to figure it out.”
Needless to say, I was annoyed.
I’d been plugging away at this error for a good three hours now, with several different teammates and lots of attempted solutions, and had gotten nowhere. I was at the frustrating stage where my code worked (I thought — I could clearly see the front end doing exactly what I wanted the test to do) but I didn’t how I had broken the test, or why it was working with the reset code.
At this point part of me still wanted to implement one of the two suboptimal solutions:
Commit the test that passed mysteriously and hope no one asked us to explain it
Reset the code back to its ugly, plain link/unstyled state with a comprehensibly passing test.
It was also lunchtime, which may have had something to do with my frustration.
I switched pairs to get fresh input and we plugged away at the problem and then all of the sudden it came to us in a flash — in fact, the bit of Rails magic was a link, not a button, which is why ‘click_link’ worked, even though this link had managed to get attached to a button class.
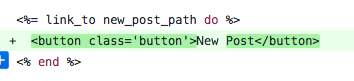
Great, so all we needed to do was to change ‘link_to’ to ‘button_to’ and be on our merry way. Simple.
Have you ever tried editing code from one unfamiliar syntax to another unfamiliar syntax while it’s lunchtime and your brain is fried from a morning of debugging?
We reconvened after lunch (in my case, a nap) and in twenty minutes had sorted out the syntax, the tests passed, and the browser looked fantastic.
The End.
The evil bug was defeated because:
Curiosity and a desire to learn drove the team to find the best solution
Teammates kept pushing each other forward when someone was discouraged
The team shipped outstanding code, which communicated its intent clearly to the dev who will work on it tomorrow, and which can serve as a template for future code. No replication of errors on their watch!
The team also shipped simple, well-refactored code: 3 lines of ‘link_to’ code became one line of ‘button_to’ which also looked better on the UI
The team respected the TDD process: even when it was a giant pain in the neck to have a mysteriously failing test, we still ended up with much better code because of it
The team pair programmed really effectively to solve this problem, rotating the people working on the bug so there was a good supply of fresh input mixed with the knowledge of one of the devs who wrote the code
The whole Makers Academy experience is summed up in this bug experience: pairing, TDD, XP values, and rigorous code review. I’ve never been so proud to be a MA student as I was today.
With thanks to teammates Jon, Miles and Sandy, to the rest of the remote April 2017 cohort, and to the MA staff.
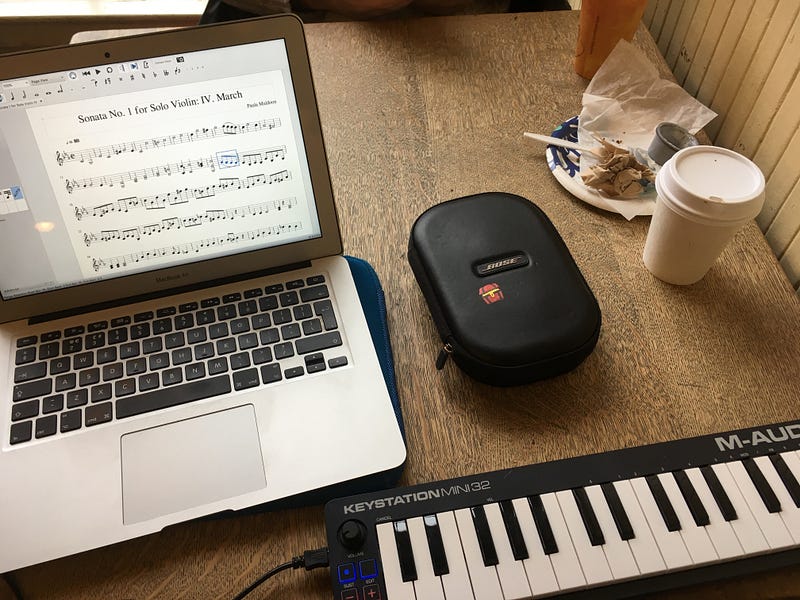
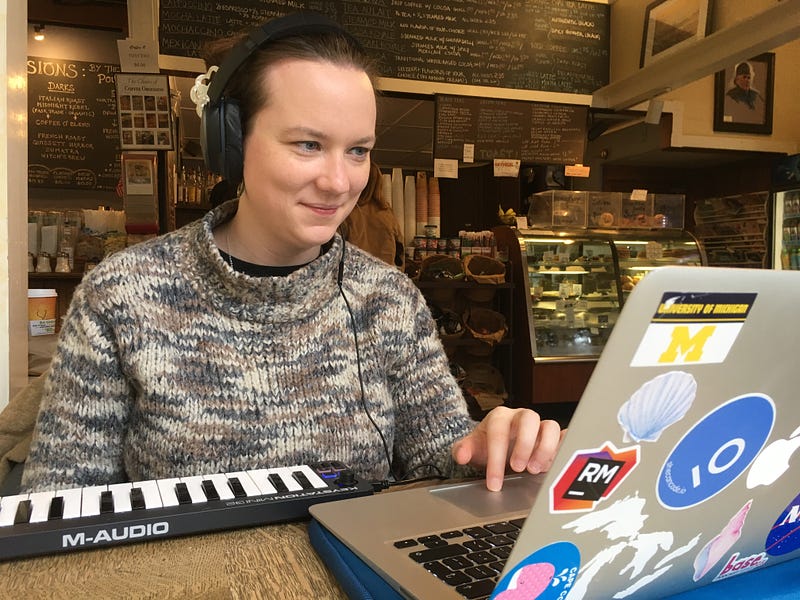
I use a midi keyboard to input notes into Musescore. Great for composing quickly! Doesn’t do rhythms but the pitch saves you a lot of time. Really portable as well — took it on a transatlantic flight iwth no problem.
I use this app every day with my practice and I think I’ve barely scratched the surface of what it can do. Shoutout to Andrew Hitz at The Entrepreneurial Musician podcast for introducing me to this!
Benefits
Make practice lists
Record yourself easily
Metronome/tuner
Tracks time spent practicing
Tracks practice streaks
ForScore — for reading music
I got this app several years ago for reading music, back when it was half the price. Not sure I’d buy it now as there might be cheaper alternatives, but I’m very pleased with it nonetheless.
PiaScore — IMSLP app
Great for downloading music from the wonderful free IMSLP library.
Musescore — for composing
Like Sibelius, but free. I compose on my MacBook Air but there is an iPad app as well which I haven’t tried.